Improve your WordPress site speed
Share This Article
Have you noticed your WordPress site speed is atrocious and want to improve it?
Here are 5 ways you can improve your WordPress site speed.
You might go to your website one day and discover your website takes way longer than it used to, to load. Or you install a new plugin and your site is spinning and spinning.
I actually timed my site and it took an entire 30 seconds to load.
That is an eternity.
Reports suggest your website should load within 2 to 3 seconds. My 30 second site load was completely unacceptable and I needed to work on fixing that, because I want people to stick around.
By taking the steps I am about to mention I have actually gotten to a 10 second load time (for the entire page to load).
Even though, that’s still not in the acceptable range, it’s a massive improvement and I will continue to work on my load times. But it’s no longer a depressing nightmare I urgently need to deal with.
Get a before picture of your site speed
Step 1
Now before we get into making our major improvements, let’s identify how long your site actually takes to load. So that you know if you really have problems.
I have a very basic approach.
Open your website in a browser and count the number of seconds it takes for the page to fully load.
Yeah, basic right.
That’s the best way to get an idea of what a visitor to your site will experience.
To get an even more accurate picture, be sure to clear your browser cache and history before doing my suggested “speed test count”.
Step 2
If you are wary of basic, then let’s also get some official performance measures on your website.
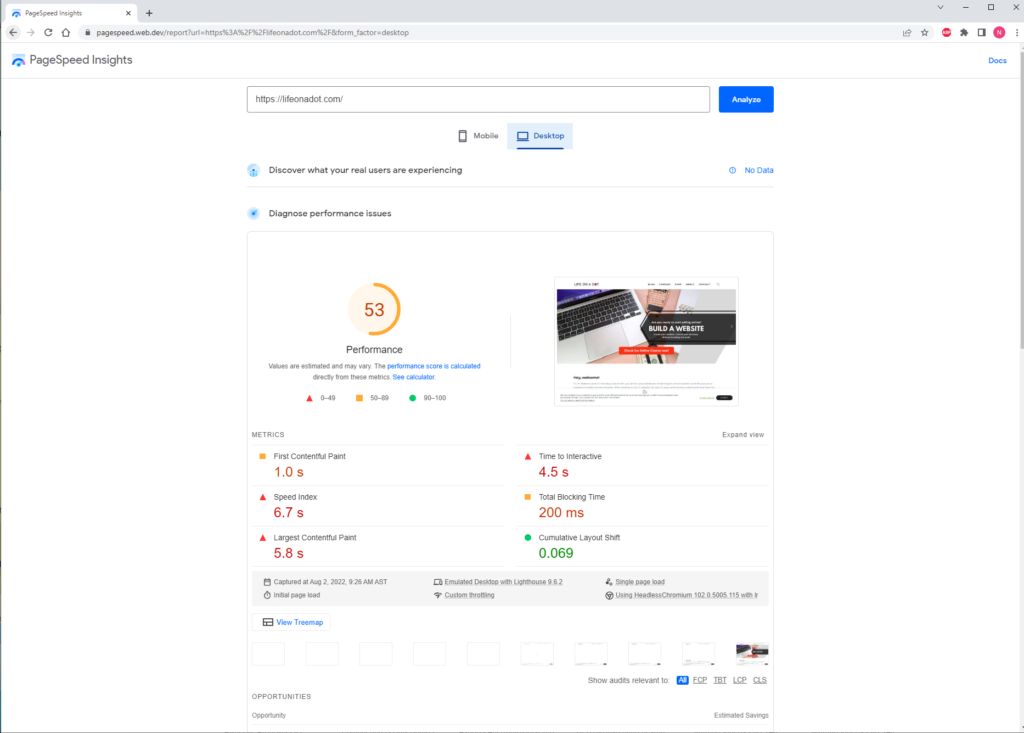
Go to PageSpeed Insights website and enter your website in the box (you can copy it from your browser and paste it in). Click the analyze.
It might take a while for the results to refresh on the page, but you will get readings for the mobile and desktop versions of your website and a score.
I had some horrible scores for my analysis, so it only confirmed that issues existed with my site.

Ok, enough blabbering.
Now that you know your before results, let’s get into making some improvements
Steps to improve site speed
1. Use Optimized Themes
I wish I knew this before but the first thing to do is to check your theme performance before you buy it.
Themes use a number of plugins and add-ons to give you the functionality you want for your site.
These plugins are not necessarily developed by the theme developer so they have little control over them.
That also means there a number of ways for less than optimized code to be included on your site. I’m not blaming anyone, it happens.
I would recommend using the PageSpeed Insights website to check the live theme version of the ones you are interested in, to confirm some results, before you commit to a purchase.
You may not get perfect scores on many, but at least you will know where you are starting from and you can implement some of the other measures I mention here to improve them further.
Now, if like me, you already have a theme purchased (and you don’t want to spend more money to get another one), have no fear. We can still get through this with the next steps.
2. Reduce Image Size
Yes, pretty simple right, who would have thought.
Large images will affect your page load times, so make them smaller.
I used Photoshop to reduce my image sizes. It’s embarrassing but my images had dimensions of over 6900px X 3500px. Yikes.
I should have known better, but I didn’t even think about having reasonable sized images. I just wanted the best quality.
Reducing the dimensional size of your image is a fast way to reduce the overall file size.
To maintain a good and clear image, I reduced mine to around 2500px X 1200px and saved my images as jpeg (they were png) and used medium quality.
3. Use WebP and AVIF format for Images
What???
Yeah, I wanted to know when jpeg and png became taboo.
Converting to these formats is quite simple. There are plugins that can convert this for you easily.
Go to your plugin section in WordPress and add new, to search for WebP plugin.
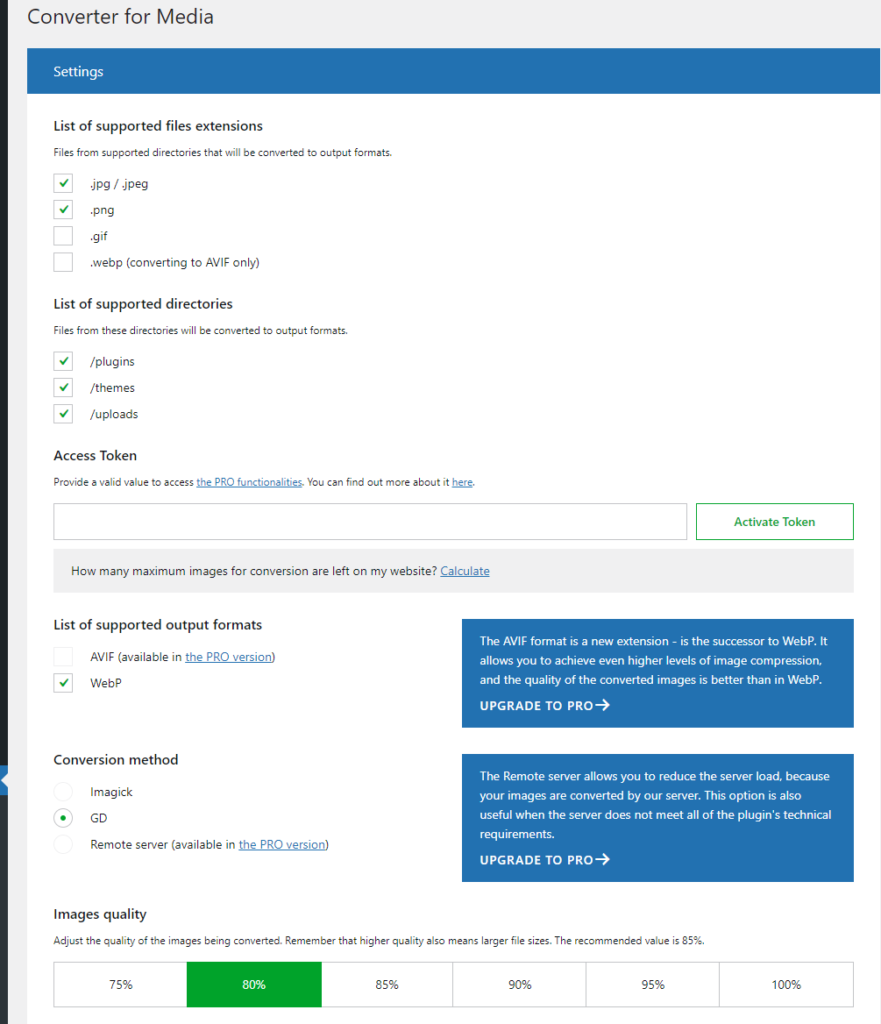
You will get a listing which you can pick from. I went with the Converter for Media plugin. Choose to install one of the plugins and activate.
Go to the settings of the plugin to complete any steps it might have.
Using Converter for Media was pretty straight forward.
Only WebP conversion was free, which was fine with me.
I mostly used the default options. I did include some additional directories and changed my image quality to 80%. Then save those changes.

Next, click the Regenerate All button, to start converting the images. It was that easy.
This part took a while. You might get some failures with converting, and those you can review after if you like.
I didn’t because the message indicated they were 1. in the plugin directories which I wouldn’t tamper with and 2. the converted webp size was larger than the original.
After this initial run and going forward, new images you upload should be automatically converted.
Clear your cache and your images should be good to go from now on.
4. Have an efficient cache policy
The claim is a longer cache lifetime can speed up repeat visits to your website. Cache is basically the saving of images or files from a website, for a certain time period on a computer, when the website is opened. This makes it faster to load when you next visit the site and helps as the images or files don’t need to be downloaded in it’s entirety on your next visit.
Implementing this is also very easy and can add so much benefits.
Let’s go once again to our plugin section in WordPress, to add a new plugin.
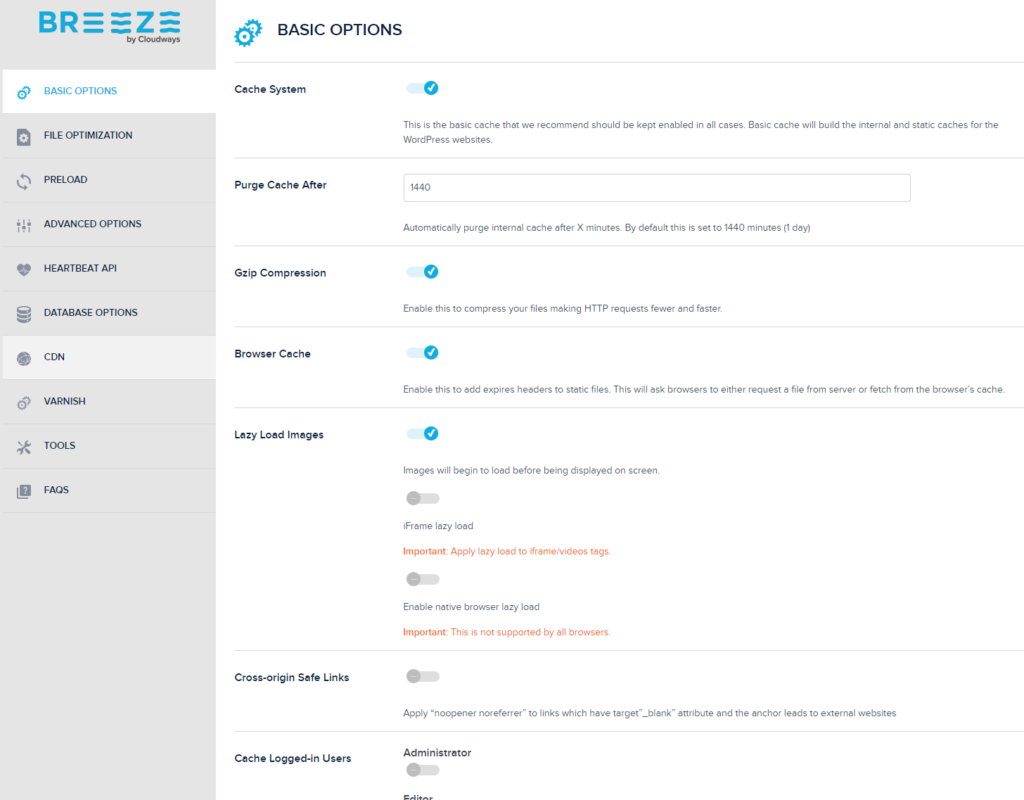
Search for the word, cache, and you will get a number of available plugins. Pick one to install and activate. I used the Breeze plugin. I’m not saying it’s better than the others, I just picked one.
Go to the settings of you new plugin and make adjustments accordingly. Below I show some of the adjustments I made.

There are a lot of settings you can address here, but I only adjusted a couple for now.
And Voila! You might already be able to see some improvements with these couple changes.
Go do your basic test and speed test again and check it out.
There is one final change you can make though, let’s get into that now.
5. Reduce Javascript execution time
Your website, plugins, add-ons, will most definitely be using some form of Javascript and CSS. These can be aspects of your site that are not optimized. So now we will look at one way to optimize what we need for our site to function.
Go to the plug in section and you will be adding the Jetpack Boost. Install and activate this plugin.
Go to the settings and simply click next to start.
I selected the following options and allowed the plugin to do its thing. Leave each step to completed accordingly.
My stats jumped from a score in the 50s to the 60s. Now I know that isn’t impressive but I could actually see my website loading way faster, so I felt confident.
My current mid 60s score is still mehhh, but I’ll slowly keep improving on things and this score changes every time you analyze your page.
What now?
Well, go implement some of these strategies, you will see some improvements I’m certain of it.
If you try any of them, let me know your experience.
I am definitely trying some other strategies and will update some time on that progress.
Be sure to follow me on my other platforms and sign up for the newsletter, to know when I post.
I’m trying to be consistent, trying my best. 🙂
Build a Website with me
If you would be interested in building your own online store, sign up for my Build a Website course where I take you all the way from the starting process to launch day of your website.
I hope I see you in class.
