Customise a Website Template
Share This Article
A website template is a fast and easy way to get a nicely designed look for your online store. There are a couple things you can alter to customise a website template that are on the non-technical side. But beware, all templates are not created the same and some times you may need to get technical to make changes.
In this blog I will delve into how you might be able to make these changes.
I will mention the e-commerce software I use, Prestashop, as an example of how this can be done, but the concepts I identify can be applied to any template for any type of website.
In my last post, about leaving my job, I mentioned I had a couple of projects I would be working on. These projects were going to become my new sources of income.
One of those projects is my online store, Crafted Favours, which I have been tinkering with for years. I decided to first revamp my website. Basically, after some years of the same old boring design I decided it was time to freshen things up. There are so many amazing template designs out there, it made the best sense to get one. Also, doing this allowed me to focus on other tasks I couldn’t “outsource”.
The Redesign
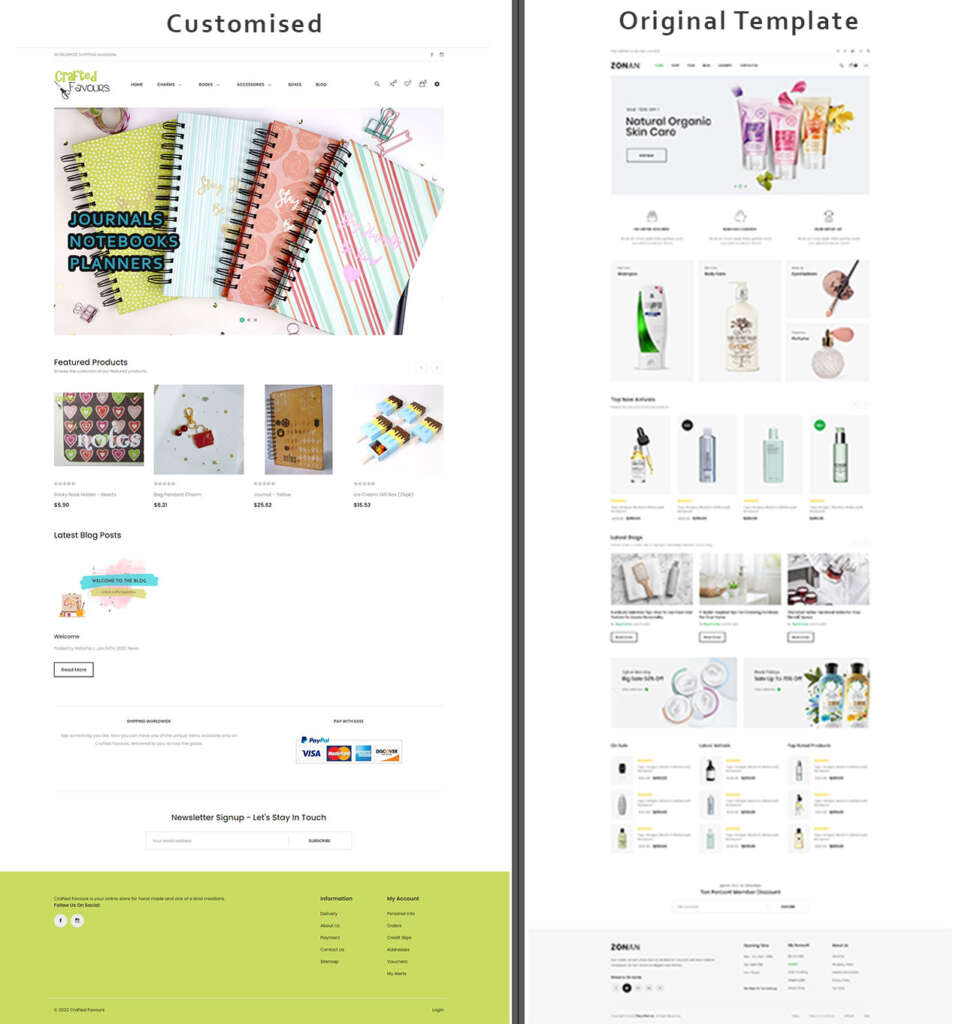
Take a look at my revamped store (Customised) where I applied the options I am going to discuss to alter the original template.

Here are 5 ways to customise a website template and spice up your sites design
1. Banners
Templates come with some pretty awesome looking banners, but of course, you need to change these to match your store.
Banners are great to quickly highlight to your customers what you have in your store.
Back in the day I would crack open Photoshop and try to mock up some cool looking designs there. Nowadays, you don’t need fancy or expensive tools to beautify your site, there are online options to get you started and for free.
You may already know of this particular tool called Canva. Even though I still go to Photoshop for some projects, I find myself really enjoying using Canva with the numerous templates and options they have available. It is so quick to mock up something.
To start on your custom banner:
- Determine the dimensions of the banner that came with your template. I use the Prestashop e-commerce software for my store, so you can go to backend in Prestashop and view the slider module. This is where the template image will be. There you can download the image and save it to your computer. Once its downloaded, right click on it to view the properties and view the dimensions.
- If you have another software, you can take a peek at your backend to determine the image location. Just know, the dimensions are not entirely necessary, but it is best to keep within the limits so that the layout of your template is not thrown off too much, when you upload your custom banner.
- In case you didn’t know, dimensions are written in numbers and represent pixels (px), so for example you might see 1200 x 800 px (Width x Height).
- Whether you are able to determine the dimensions of the image or not, keep all your banners the same dimensions for a smooth transition. This is especially important if you have multiple banners or images sliding on your website. Images with different dimensions can cause jerks in transitions or completely cut off parts of the image.
- Now, go to Canva and you can either (a) choose the banner option they have (that will be Canva’s default dimensions) or (b) create a design with your own custom dimensions (custom size).
- With your new blank canvas in Canva, create your new banner in the style you want for your website and have fun. Canva has numerous free and paid options where you can easily drop designs and alter.
2. Layout
Being able to easily edit the layout would be based on the features offered by your template. So it’s always good to review the template and take note of the various options offered, before you buy it. Your template may up front offer different layouts for the header, for example, the one I purchased had 3 options which included the logo on the left or centre, so there can be multiple layouts to change things up.
Within the ecommerce software itself, you can change the layout of items. In Prestashop, this will be under the Design -> Positions. You can remove elements you don’t want from the page and even relocate them to another section. You can even change the order of items on the page or change the number of items displayed. For example instead of four products being displayed side by side, you can change this to six.
So take a look at your software and know that you have these additional options.
3. Colours
Easily changing the colours in the template may be an option you have built into your template. Unfortunately, my template did not have that option. So this one was more on the technical side. It first identifying the element to be changed and then defining the element in, what is called a, Cascading Style Sheet (CSS).
Hopefully you have the easy option but changing the colour is an easy way to alter the design.
You can change the colour of the footer, which is that section to the bottom of the page. This is what I did for my design. Some other colours you can change would be of the background of the entire page or just the menu. You can even change the colour of the font.
Just to share what adding code to your CSS might look like let’s look at an example.
The following code entry will add a background colour of black to the body of the entire webpage. This entry needs to be added to the CSS file to make this change. And as a note, colours are represented by hexadecimal (hex) values. #000000 is the hex value for black.
body { background-color: #000000 }But consider colour as a valuable option when it comes to altering the original template.
4. Font
I mentioned changing the font colour in the previous section, to add some customisation. But did you know you can change the actual font. Depending on the style of your business you may be able to bring this through using a particular font.
Changing the font is also one that could be considered technical, if it’s not something made available through your template design. The technical side would require you to change elements in the style sheet (CSS) again. To get some free fonts you can browse through Google and maybe you can find a font to match your design vision.

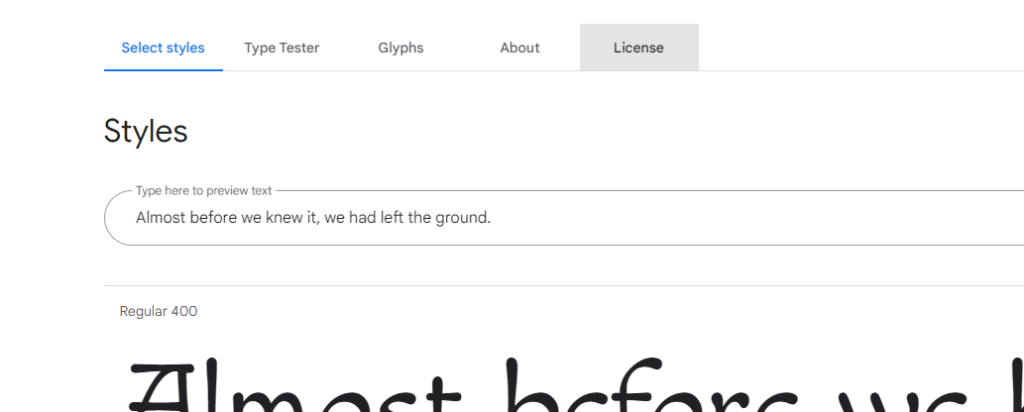
On any font you are interested in on Googles font page, you can review the license to first ensure you can use it freely.

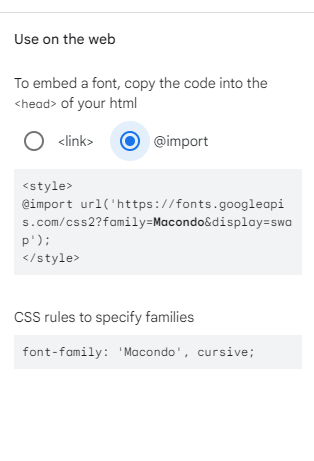
For your selected font, click the link on the page to “Select this style”. The details would be shown with links on how to add the font to your website for further use. Besides adding the links as indicated, the CSS also needs an adjustment to indicate the elements that will use the font on your webpage. For example, you may want the font to only be for headings and those tag elements would be h1, h2…. etc.
An example entry in the CSS to indicate that a heading (h2 in this example) would use the Macondo font would look like the following.
h2 { font-family: 'Macondo', cursive' }5. Hire a Web Developer
And finally, if your template does not offer any other features that will allow you to easily custom the design, the next best alternative is to hire a developer to get into the code to assist you.
Any skilled developer should be able to get into the template code and figure out the elements that need to be changed. It’s a bonus if they are familiar with the e-commerce software you use. But engage a developer to change non-major things. They can change the colours and fonts as I mentioned. They can also change the width or height of elements laid out on the page. The styles of buttons or icons.
If changes you want are going to change the entire design of the template, then you probably need to design your own template (or theme as its called). It will then be truly customised for your website.
There you have it
Those were some of the ways you can change and customise your website template. Some are easy for anyone to do and some require a little more technical know how, but now you know.
Build a Website with me
If you would be interested in building your own online store, sign up for my Build a Website course where I take you all the way from the starting process to launch day of your website.
I hope I see you in class.
